
robotics-university.com | For simulation purpose using EPSON Robot simulator, before make robot program using EPSON SPEL+ language to control the EPSON robot motion, we must create the environment or the layout of the EPSON robot. The environment may contains with some objects that shaped as box, sphere, or cylinder (See figure 1). With the kinds of provided objects, we can make a work table or work thing.

Figure 1. The kind of object button (Box, Sphere, Cylinder)
To place an object on the top of the simulator plane, click one object button that you wanted. For example Box button. After you click the box button, on simulator plane will appear a Box object and on the Layout object will generate SBox_1 root. The properties of SBox_1 object will showed on the Property grid if you click the SBox_1 root. See figure 2.

Figure 2. SBox_1 object on 3D view tab
In order the object position in your expectation position, you have to move the object from the initial position to your expected position.

Figure 3. Moving the object position
To move the object to a new position horizontally, on the Property Grid part, you need only change the X-axis coordinate value in order the object position move to your expected position. In this example, to move the box object exactly in front of the C4 robot, please change the X-axis coordinate value with zero-millimetres (0 mm) while for the Y-axis and Z-axis coordinate value leave with its initial value (Y = 600 mm; Z = 50 mm). See figure 3 and figure 4!

Figure 4. SBox_1 object has moved to new position
If you add some new object, just do the same treatment above in order your environment/layout for EPSON robot simulation reach your expectation. Except moving object, you also change the object name, size, rotation, colour, collision, and collision point.
Saving the Object Properties Configuration
If you have finished with your object properties configuration, don’t forget to save the changed configuration. To save it, just click the File menu and then select “Save” option, or you can use shortcut too, i.e. Ctrl + S. See figure 5!

Figure 5. Saving the object properties configuration
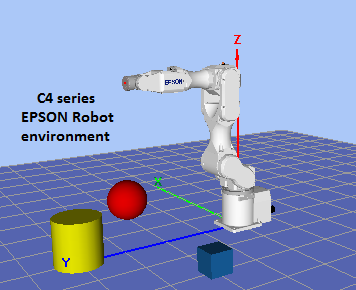
Until this point, congratulation, your EPSON robot environment/layout for simulation purpose has been ready to use. See figure 6 and figure 7!

Figure 6. The ready EPSON robot environment/layout (3D view)

Figure 7. The ready EPSON robot environment/layout (2D view)
0 comments:
Post a Comment